May 17, 2019
Making and Painting a Runway Control Vehicle from P.G. Models
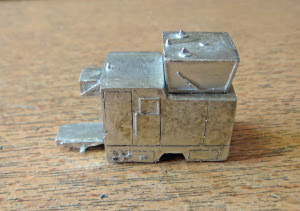
Well, not quite “all.” With the wheels missing and the front of the body in place. Even so, this is certainly one of the simpler models in my range.
I have made the chassis integral with the body floor for ease of construction. It simply slides into place along a step inside the body, and then goes down into a central slot on the body front.
Here I’m holding the chassis/body floor up against the body whilst the two-part epoxy resin sets.
I have made the observation cupola with solid windows to be consistent with the other models in my range, but this could be opened up or replaced with one made up from plastic card and clear acetate sheet if you wanted to have one with transparent windows.
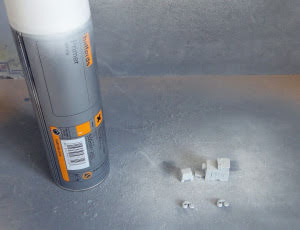
I usually use Halford’s grey primer, but for this vehicle I used the white one. My “spray booth” is simply a piece of hardboard and a piece of cardboard vertically behind it. When you spray, start just off the model to the left and have a steady spray across the model and onto the board to the right of it. Do this gently and repeat until there is an even layer of primer all over the model. Remember that several thin coats of paint are better than one thick one where the paint will run and clog up any detail.
Start by spraying on the underside. This is an acrylic based primer, so it dries very quickly. Even so, I still leave it for about 15 minutes before turning over the parts and spraying the upper surfaces, then leave for a couple of hours before any top coats of paint.
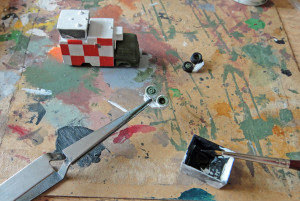
All of the upper surfaces were painted in satin white using the flat brush you can see to the right. Take care to keep the paint off the windows as a matt surface is best for going over them later on with a pencil.
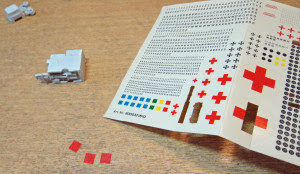
The completed model that I have shown on my website is painted overall light olive green, with yellow stripes. For this one I fancied something a bit more colourful, with the red and white chequer board pattern, with a green cab, wheel hubs, and chassis. The big problem was how to do it. I thought of painting it white and them masking off the white and spraying on the red, although there is often some paint creep around the edges of the masking tape. Then I had an idea, what about using red transfers/decals from red cross markings. The ones above came from a 1/87th scale Roco Minitanks set and were exactly the right size. You could use any suitable source of red markings. Something like a 1/35th scale ambulance marking would also do, if you’ve got one spare.
For these transfers I used Humbrol DecalFix and was very pleased with the end result. The DecalFix was brushed on the model where the transfer was to go. The transfer was put into a shallow dish of water, to the top right, for just a few seconds. It was then taken out of the dish and left on one of my fingers for a bit longer until the transfer started to loosen from the backing card. It was then slid off my finger and on to the model, onto the wet DecalFix. Once happy with its location, a light coat of DecalFix was put over it. Leave for a few minutes to set, and then onto the next piece.
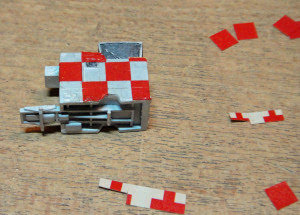
I didn’t have enough of the larger squares for the top parts, so made these up from some smaller red crosses, as you can see in this photo.
Once the transfers had fully set I then went over all of the body with a thin coat of matt varnish. Staying with the Humbrol brand, I used their “Matt Cote” after giving it a good shake beforehand. Matt varnish is one of those things that often causes problems. Most times it seems to leave a slight sheen, and is very rarely truly matt. However, with this Humbrol product I found that the finish was consistently matt. And no, I’m not on any commission from Hornby (the owners of Humbrol).
Here’s a case of “do what I say, not what I do.” I should of course have painted the green parts before applying the transfers. but I just about managed to keep the green paint off the red and white bits.
As usual, the wheels were painted matt black, with a touch of matt white added to it. The wheels were left on their sprues for ease of handling.
Once the paint had fully dried, the wheels were clipped off their sprues using a Xuron cutter. They were then cleaned up using a No.10 scalpel. I used to do this using a file, but find that, no mater how careful you are, there will always be some bits of filing that mess up the wheels. Using a scalpel saves this from happening. Once done, the bare metal was painted using the same mix as before.
The wheels were fixed in place as usual with a two-part epoxy resin, in this case the 5 minute version of Devcon. It always seems to take longer than that to set, but it is a lot quicker than the other version of it,
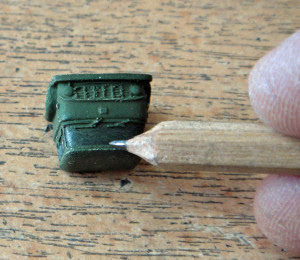
All windows on the cab, the body and the cupola were rubbed over with a pencil. Keep the pencil at as flat an angle as you can, and avoid pressing too hard to save lifting any of the paint. I did in a couple of places, but it doesn’t show too much.
And here’s the finished model, or nearly so. After taking the photos I’ve noticed a few places where the white looks dirty, which would probably be true to reality, but I would rather have it looking clean. Overall though I’m pleased with the end result
P.G. Models
Subscribe to:
Post Comments (Atom)










No comments:
Post a Comment